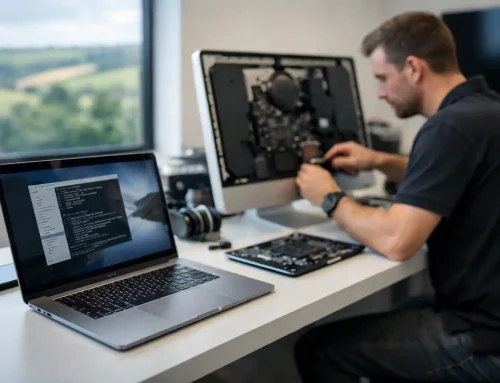


A Mac that stalls halfway through an update can feel far more serious than it often is. The screen may sit on an Apple logo, a progress bar may appear frozen, or a message may say that macOS could not be installed. A Mac update failure is frustrating when you need to send invoices, access family photos or simply get on with the day, but the wrong reaction – repeatedly switching it off or erasing the disk too quickly – can turn a recoverable problem into a bigger one.
The sensible approach is to give the Mac enough time, check the basics, and then use the least disruptive recovery option first. Most failed updates are caused by limited storage, an interrupted download, an unreliable connection, an older application or a disk issue that was already waiting to be dealt with.
First, check whether the update has really failed
A progress bar that does not move for ten minutes is not always stuck. Major macOS upgrades can spend a long time preparing files in the background, particularly on an older iMac or a MacBook with a nearly full drive. The screen may go black and restart more than once as well. Leave the Mac connected to mains power and give it at least an hour before assuming the process has failed. If it is warm or the fan is running, it may still be working.
If the progress bar has not changed for several hours, the Mac restarts in a loop, or you see a clear installation error, it is time to intervene. Take a photo of any error message before restarting. That small detail can save a great deal of guesswork later.
Avoid forcing a shutdown unless the Mac is genuinely unresponsive. If you do need to do so, hold the power button until it turns off, wait around 30 seconds, then start it normally. A successful restart may allow macOS to finish its housekeeping and return you to the login screen.
Common reasons for a Mac update failure
Storage is one of the most frequent causes. An update needs room not just for the installer but also for temporary working files, backups of replaced system components and the installation itself. A Mac can look as though it has enough free space, then fail when it reaches the final stages. As a useful rule, aim for at least 25GB of free storage before a significant macOS update, and more if your Mac is older or already running slowly.
A damaged or incomplete installer is another familiar problem. This can happen when Wi-Fi drops out, the Mac goes to sleep at an awkward moment, or an update download is interrupted. Removing the installer and downloading it again can be enough, but only once you have confirmed there is sufficient storage and a stable internet connection.
Older Macs also have compatibility limits. Not every model can run every version of macOS, and some specialist business software, printers, scanners and security tools may not work properly after an upgrade. This does not mean you should never update. It means checking the Mac model, the macOS version on offer and the software you rely on before committing.
For home users, the concern may be access to photos, iCloud and email. For a small business, a failed update can interrupt Microsoft 365, accounting software, shared files or a vital printer. The update itself is rarely the whole story – the surrounding setup matters too.
What to do before trying the update again
Once the Mac starts normally, do a little preparation rather than pressing Update straight away. Back up first if you can. Time Machine is ideal when it is already set up, but a current copy of essential documents, photos and business files to an external drive is better than no backup at all. Make sure you know the passwords for your Mac user account and Apple Account as well.
Then check available storage in System Settings, or System Preferences on older versions of macOS. Remove obvious large downloads, empty the Bin and move files you no longer need from the desktop. Do not delete unfamiliar system folders in the hope of making space. That often creates a second problem.
It also helps to restart the Mac before attempting the update again, disconnect unnecessary accessories and connect directly to reliable broadband where possible. A USB hub, old external drive or third-party security utility can occasionally interfere with an installation. Keep the charger connected throughout, especially with a MacBook.
Before upgrading, consider whether you actually need the newest macOS immediately. Security updates for your current compatible version are often the safer choice when you depend on older software. If you use a particular label printer, music interface, bespoke database or older Adobe application for work, check it is supported first. Waiting a few weeks can be a wise trade-off when the Mac is central to your livelihood.
Recovering from a Mac update failure safely
Start in Safe Mode
Safe Mode starts macOS with fewer background items and carries out a basic check of the startup disk. It can resolve an issue caused by login software or cached files, and it may give you enough access to back up important data.
On an Apple silicon Mac, shut down, then hold the power button until startup options appear. Select your startup disk, hold Shift and choose Continue in Safe Mode. On an Intel Mac, restart and hold Shift until the login window appears. The first start can take longer than usual, so be patient.
If the Mac starts in Safe Mode, restart it normally afterwards. If it works, check storage and retry the update only after making a backup.
Use macOS Recovery and Disk Utility
If the Mac will not start, macOS Recovery provides tools to check the internal drive and reinstall the operating system. For Apple silicon Macs, hold the power button during startup until you see Options. For Intel Macs, start up while holding Command-R.
Choose Disk Utility first and run First Aid on the internal drive and its volumes. This checks the file system for errors that can prevent an update from completing. If First Aid reports that it cannot repair the disk, stop before erasing anything. That may point to a drive fault, and preserving your files should be the priority.
If the disk check completes successfully, return to Recovery and choose Reinstall macOS. This normally reinstalls the operating system without removing personal files, but there are no guarantees where a drive is damaged or the previous installation was severely interrupted. A backup remains the safest protection.
Be careful with “Erase Mac”
Erasing the Mac can solve a stubborn installation problem, but it removes local data. It should be a last step, used only after you have confirmed a backup is complete or a professional has assessed whether the data can be recovered. An erase may also trigger Activation Lock, so you will need the Apple Account details associated with the Mac.
When it is better to ask for help
There is no prize for fixing a complicated update issue alone. If the Mac contains irreplaceable family photos, work records, customer files or years of email, pause before trying more drastic fixes. Repeated failed installations, a flashing folder icon, unexpected disk errors and a Mac that will not enter Recovery can all suggest an underlying storage or hardware problem rather than a simple software glitch.
Hands-on support is particularly useful where the update has exposed several connected issues: a full disk, an ageing hard drive, a printer that has stopped working and an iCloud account that no one is quite sure how to access. Sorting those pieces in the right order is safer than applying random online fixes.
For households and small businesses in Dorset, North Dorset Mac Man can assess the Mac at home or at work, protect the data that matters, and explain the options in plain English. Sometimes the answer is a clean reinstallation; sometimes it is a storage upgrade, a repair or simply leaving the Mac on its current supported system until key software catches up.
A failed update is a good prompt to put a proper backup routine in place. Once your Mac is working again, keep some free storage available, let security updates install regularly, and make sure your important files exist in more than one place. That little bit of preparation makes the next update far less worrying.